The concrete slump test is more than 100 years old and is one of the oldest concrete test methods around for use on fresh plastic concrete. Even though we have been performing slump tests in accordance with ASTM C143 for more than a century, the slump test is still undervalued, underappreciated, and not allowed to contribute to the overall project quality assurance (QA) program to the degree to which it was intended and capable.
Duff Abrams first developed concrete slump tests in 1922, when he pioneered concrete research with the Portland Cement Association Laboratories. His research led to a number of test methods still in use today, and a greater understanding of the relations between concrete mix design and properties of fresh and hardened concrete. He served as President of the American Concrete Institute (ACI) in the 1930s.
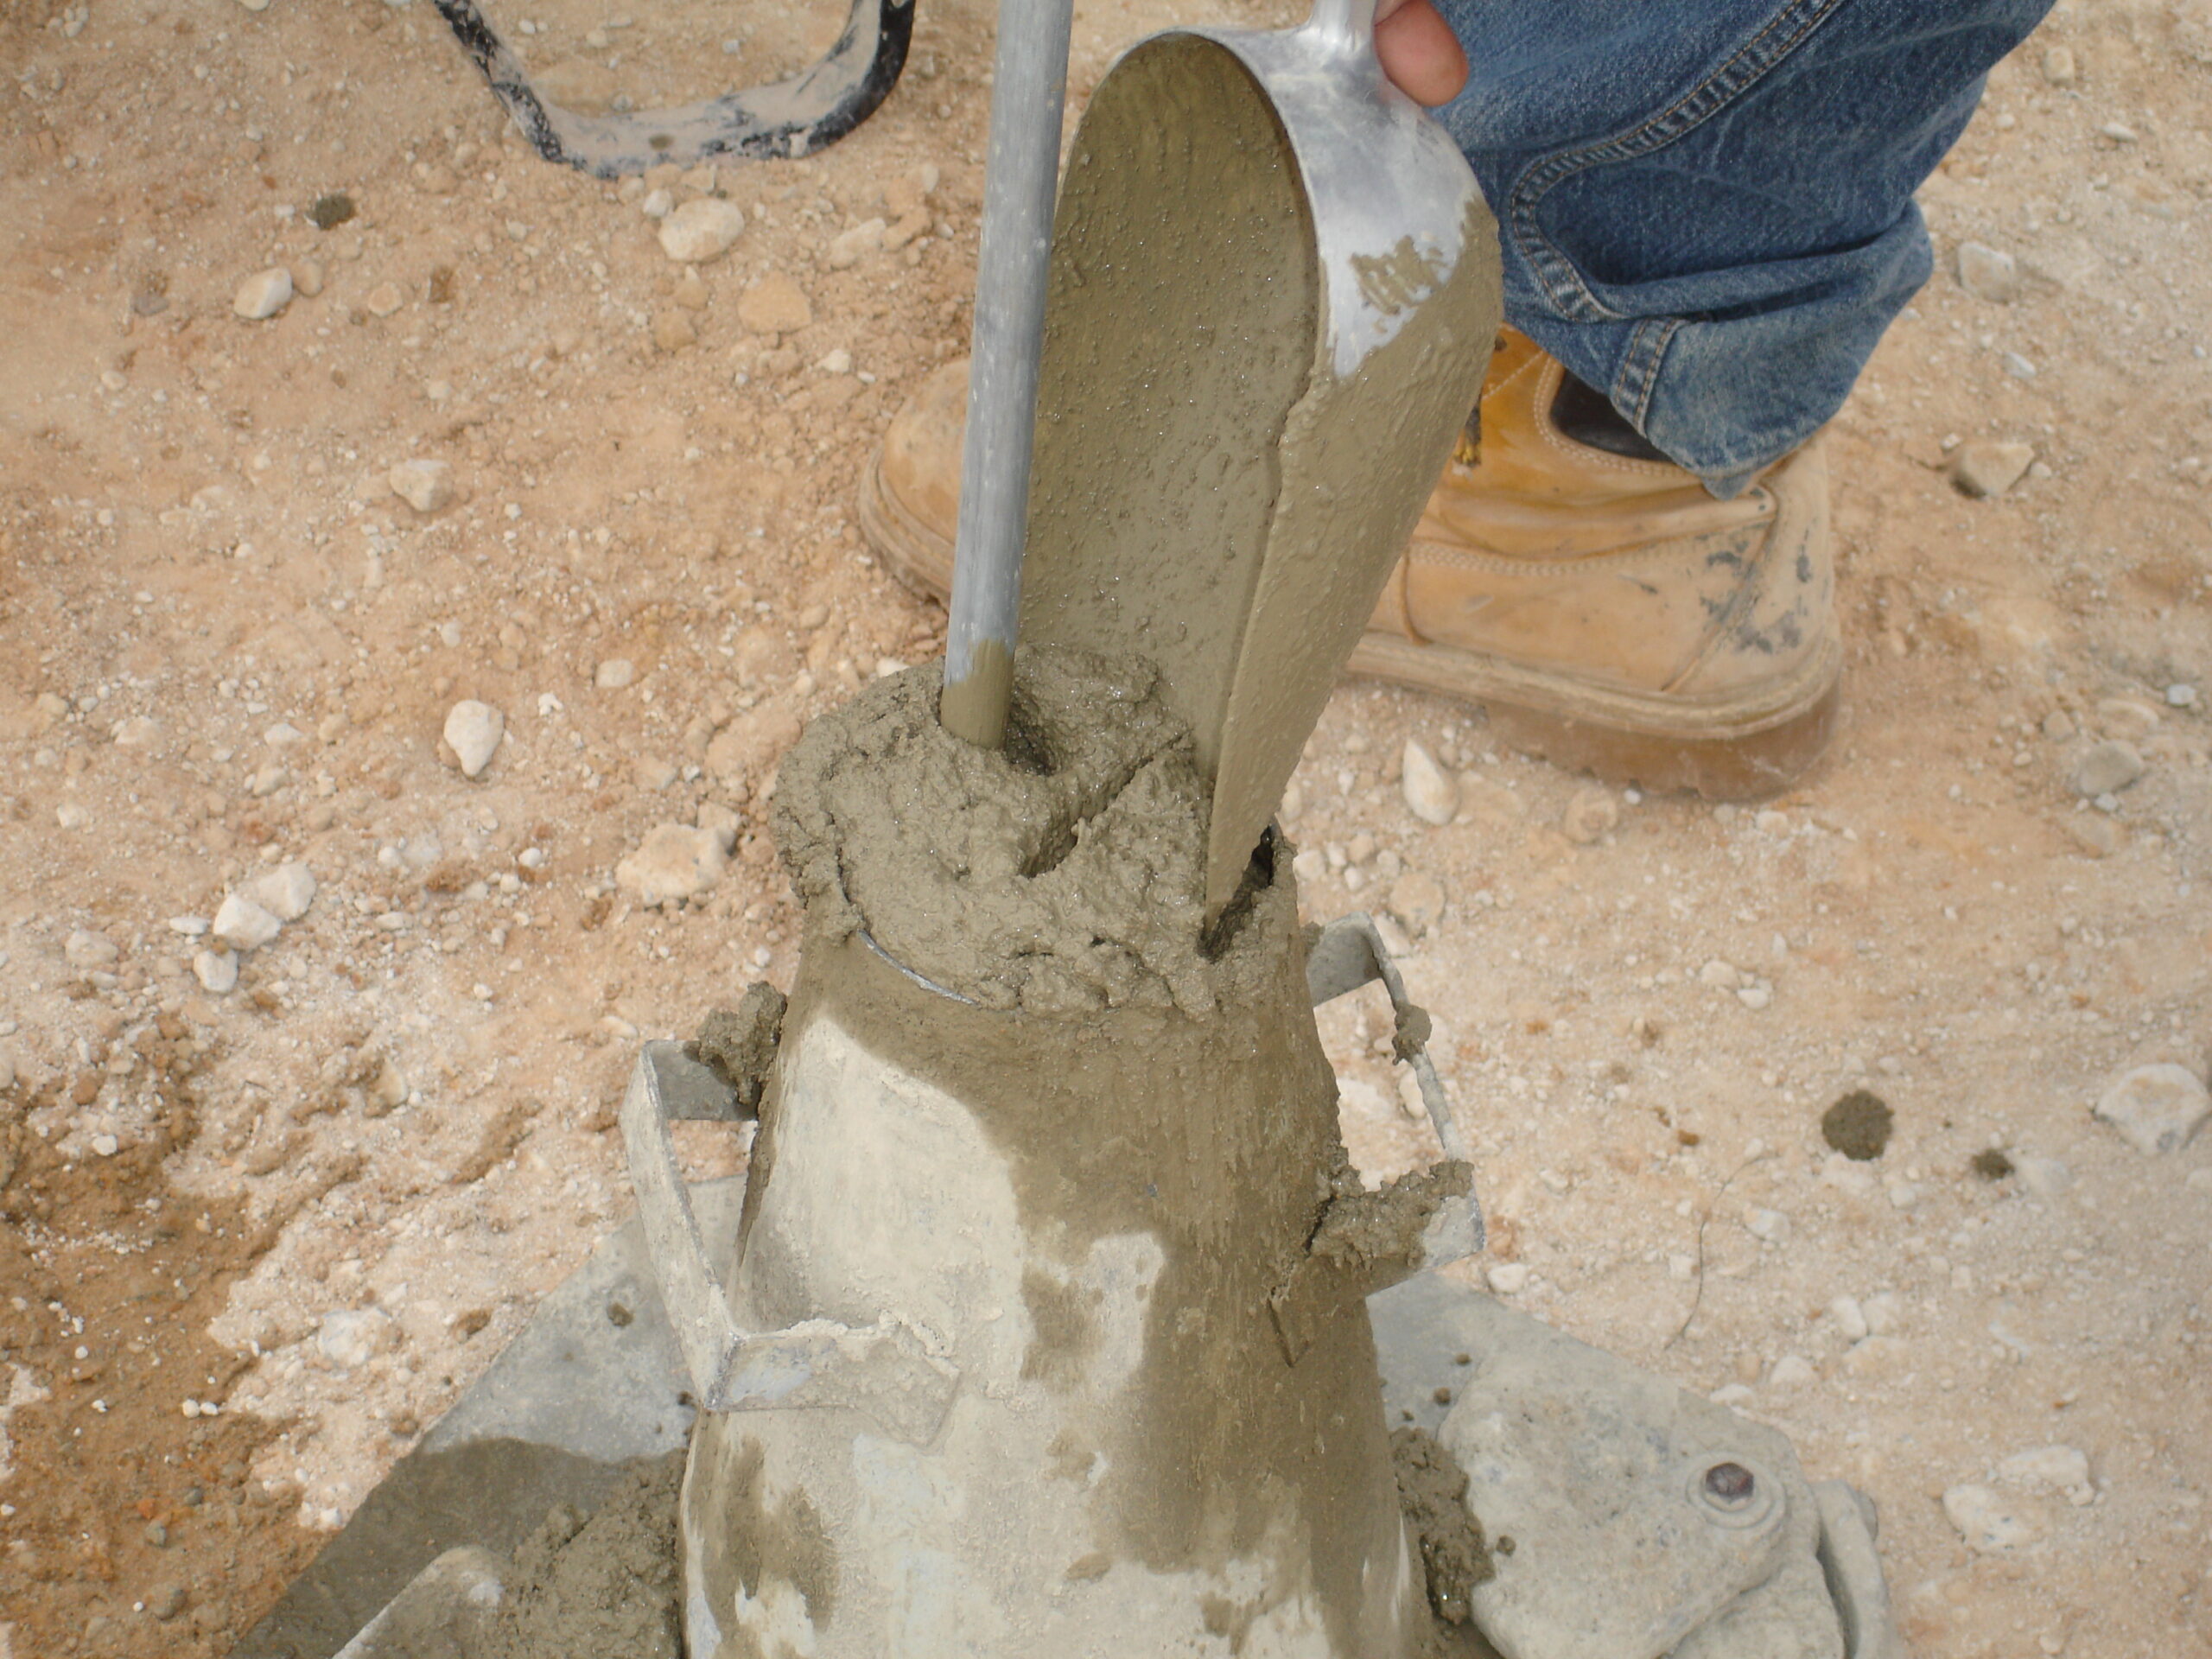
It is typical for a concrete special inspector to perform a slump test on concrete at a project site and record that the slump is within the parameters required by the contract documents and/or code. The inspector does so with little notice of any other context. This is unfortunate, because the conditions surrounding the slump test have much more useful information to offer if judged within the context of all the project slumps run previously (especially those slumps performed on the same day of the concrete placement). The concrete special inspector should take the time to observe the concrete sample from which the slump test was taken. Comprehending how the plastic concrete behaves when removing the slump cone is an excellent diagnostic tool.
Potential problems with the concrete can be detected and evaluated when something can still be done to correct them. Observe how the concrete test sample slumped when the slump cone was lifted. Was it a true slump where the concrete just settles straight down and remains intact, and the original center stays in the same orientation? Was it a shear slump where the top falls off to one side at an angle? Shear slumps can suggest the mix is too wet or poorly proportioned and could lead to segregation and bleeding during the concrete placement.
Was the slump test a collapsed slump where the concrete lost its shape and totally collapsed? Collapsed slumps suggest that the mix may lack cohesion, may be too wet, and could experience cracking during concrete placement and finishing. Locating the displaced center of the (original) top of the slump can be difficult with shear slumps and collapsed slumps. Remember that the concrete slump (by definition) is determined by measuring the vertical distance between the top of the slump cone and the displaced original center (ASTM C143). Placing a coin in the center of the top of the slump sample prior to lifting the slump cone can be very helpful in locating the displaced center.
While the primary purpose of plastic concrete slump tests is to measure the workability and consistency of fresh concrete and determine compliance with the slump according to the contract documents and code, slump tests can provide other useful information. A comparative analysis of the plastic concrete samples and the slump test results recorded throughout the day on the project concrete placements can be informative and helpful. Context is key during this process. Comparing concrete appearance, slump, air content, workability, unit weight data, and even concrete temperature data from concrete batches from the same day allows for predictable troubleshooting.
- Slump Variation: If a load of concrete has a significantly higher (or lower) slump than others from the same day, it may indicate a lack of control over the total mix water at the ready-mix plant, including aggregate/moisture
- Trend Analysis: Identifying patterns in the concrete mix that may be related to changes in material properties such as slump, air content, and unit weight. Evaluation of this data (together) can net yield-related statistics.
- Mix Design Verification: Comparing the slump results and other field tests in tandem with a review of the material proportions on the concrete delivery ticket can verify that the concrete mix in the ready-mix truck is the same as the project mix design approved by the project RDP.
- Segregation: When the slump cone is removed, the concrete aggregate and paste portions quickly separate, showing little cohesion or Observation of segregation during the slump test could indicate issues with the coarse aggregate content, mixture proportions, inadequate mixing, or a test sample that was improperly collected.
- Water-Cement Ratio: The direct correlation of slump and the w/c ratio is not always a clear The arrival of a ready-mix truck at the job site with a much higher slump than previous loads indicates a potential compromise of the maximum w/c ratio. All standard quality control tests should be performed in these cases, starting with the slump tests and including air content tests and strength specimens.
Concrete slump tests are the most common test performed on fresh plastic concrete regardless of the project application, and the 100-year-old slump tests are still one of the most important tools in the quality control toolbox. However, the slump test accuracy depends on the concrete special inspector doing everything right, which is not said to disparage the special inspector; many procedures must be done exactly right when a slump test is performed. Steps can be missed or go wrong while performing a slump test, which can result in inaccurate and misleading information.
- Obtain the QC concrete sample from the ready-mix truck in accordance with ASTM C 172. Modified sampling procedures are often implemented at the job site for numerous reasons. The project team should agree to these modified C 172 procedures with the understanding that the QC sample will be representative of the entire concrete load.
- Mix the QC sample thoroughly so that the concrete used to perform the slump test accurately represents the QC sample. Be careful to avoid any segregation (separation of coarse aggregate and paste) at this stage.
- Once the composite sample (from which the slump test will be taken) is obtained, the clock starts Slump, air content, and temperature tests must be started within five minutes of sampling. The slump test itself must be completed within an elapsed time of 2.5 minutes.
- The slump cone must be placed on a flat, level, non-absorbent surface large enough to contain the slumped concrete. The cone must be damp (but with no excess water) and secured to the surface or base plate so that no movement of the slump cone will occur during the test.
- Ensure that the appropriate tools and procedures used to facilitate concrete consolidation during the slump test comply with ASTM C 143.
- Stabilize the slump cone so that no movement will occur during the vertical lift of the slump The vertical lift of the slump cone should be completed in 5 ±2 seconds.
- After the slump cone is removed and the concrete subsides, measure the slump to the nearest ¼ inch of the vertical difference between the top of the slump cone and the displaced center of the top of the slumped
The QA/QC roles of project concrete slump tests are critical when all project field data (slump, air content, unit weight, temperature, workability) is viewed collectively and analytically. Observe the actual QC samples as they are taken and mixed to form accurate composite samples. When the slump and other field tests are prepared, does the concrete fill the voids in the specimen molds well and are any signs of coarse aggregate/paste segregation present? Observe the workability characteristics of the QC sample; is it workable and flowable enough to work around embedded objects in the work, such as reinforcing steel? Be proactive when the project concrete is delivered with much higher slumps than earlier loads of concrete during the concrete placement. Remember that higher slumps can contribute to higher air contents, potentially compromised w/c ratios, and reduced compressive strengths. When the field data on the fresh plastic concrete becomes disconcerting, talk with the project team about the data and let the team discuss potential adjustments.